ノート
完全なサンプルコードをダウンロードするには、ここをクリックしてください
十字カーソル#
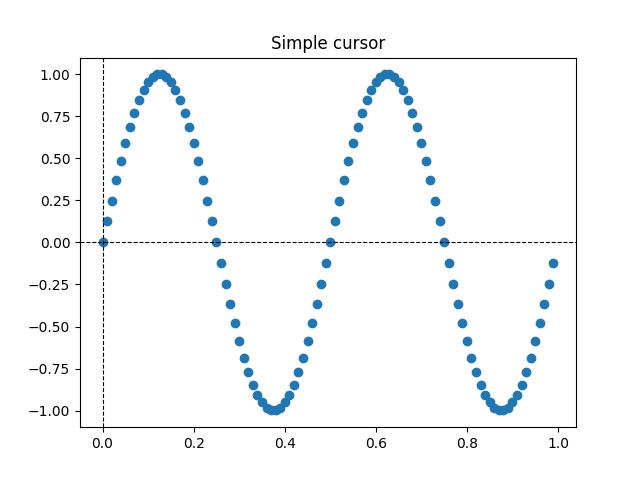
この例では、十字線をデータ カーソルとして追加します。十字線は、マウスの移動で更新される通常の線オブジェクトとして実装されます。
3 つの実装を示します。
マウスを動かすたびに Figure を再描画する単純なカーソルの実装。これは少し遅く、十字線の動きに遅れが生じる場合があります。
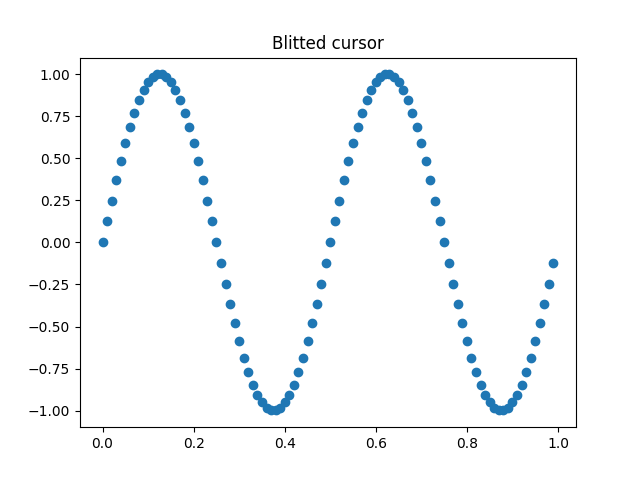
レンダリングの高速化のためにブリッティングを使用するカーソル。
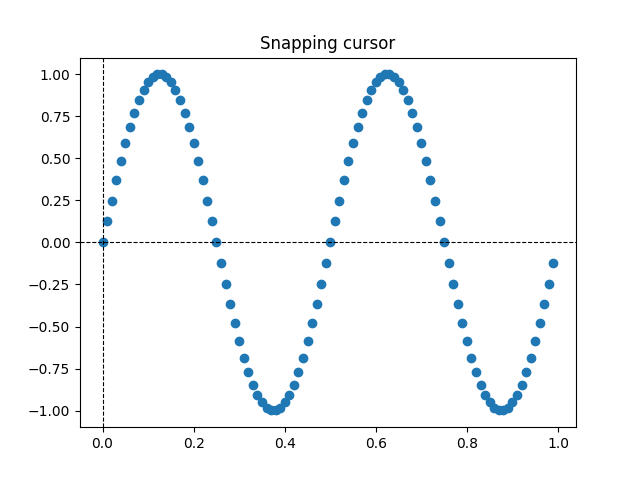
データ ポイントにスナップするカーソル。
WX でのカーソルの追加 のように、ネイティブ GUI 描画を使用すると、より高速なカーソル移動が可能 です。
mpldatacursorおよびmplcursorsサードパーティ パッケージを使用して、同様の効果を得ることができます。
import matplotlib.pyplot as plt
import numpy as np


class Cursor:
    """
    A cross hair cursor.
    """
    def __init__(self, ax):
        self.ax = ax
        self.horizontal_line = ax.axhline(color='k', lw=0.8, ls='--')
        self.vertical_line = ax.axvline(color='k', lw=0.8, ls='--')
        # text location in axes coordinates
        self.text = ax.text(0.72, 0.9, '', transform=ax.transAxes)

    def set_cross_hair_visible(self, visible):
        need_redraw = self.horizontal_line.get_visible() != visible
        self.horizontal_line.set_visible(visible)
        self.vertical_line.set_visible(visible)
        self.text.set_visible(visible)
        return need_redraw

    def on_mouse_move(self, event):
        if not event.inaxes:
            need_redraw = self.set_cross_hair_visible(False)
            if need_redraw:
                self.ax.figure.canvas.draw()
        else:
            self.set_cross_hair_visible(True)
            x, y = event.xdata, event.ydata
            # update the line positions
            self.horizontal_line.set_ydata(y)
            self.vertical_line.set_xdata(x)
            self.text.set_text('x=%1.2f, y=%1.2f' % (x, y))
            self.ax.figure.canvas.draw()


x = np.arange(0, 1, 0.01)
y = np.sin(2 * 2 * np.pi * x)

fig, ax = plt.subplots()
ax.set_title('Simple cursor')
ax.plot(x, y, 'o')
cursor = Cursor(ax)
fig.canvas.mpl_connect('motion_notify_event', cursor.on_mouse_move)

11
ブリッティングを使用した再描画の高速化#
この手法では、レンダリングされたプロットが背景画像として保存されます。変更されたアーティスト (十字線とテキスト) のみが新たにレンダリングされます。それらは、ブリッティングを使用して背景と結合されます。
この手法は大幅に高速です。背景は十字線なしで保存する必要があるため、もう少し設定が必要です (「 」を参照
create_new_background())。さらに、図が変更されるたびに、新しい背景を作成する必要があります。これは、 に接続することによって実現されます
'draw_event'。
class BlittedCursor:
    """
    A cross hair cursor using blitting for faster redraw.
    """
    def __init__(self, ax):
        self.ax = ax
        self.background = None
        self.horizontal_line = ax.axhline(color='k', lw=0.8, ls='--')
        self.vertical_line = ax.axvline(color='k', lw=0.8, ls='--')
        # text location in axes coordinates
        self.text = ax.text(0.72, 0.9, '', transform=ax.transAxes)
        self._creating_background = False
        ax.figure.canvas.mpl_connect('draw_event', self.on_draw)

    def on_draw(self, event):
        self.create_new_background()

    def set_cross_hair_visible(self, visible):
        need_redraw = self.horizontal_line.get_visible() != visible
        self.horizontal_line.set_visible(visible)
        self.vertical_line.set_visible(visible)
        self.text.set_visible(visible)
        return need_redraw

    def create_new_background(self):
        if self._creating_background:
            # discard calls triggered from within this function
            return
        self._creating_background = True
        self.set_cross_hair_visible(False)
        self.ax.figure.canvas.draw()
        self.background = self.ax.figure.canvas.copy_from_bbox(self.ax.bbox)
        self.set_cross_hair_visible(True)
        self._creating_background = False

    def on_mouse_move(self, event):
        if self.background is None:
            self.create_new_background()
        if not event.inaxes:
            need_redraw = self.set_cross_hair_visible(False)
            if need_redraw:
                self.ax.figure.canvas.restore_region(self.background)
                self.ax.figure.canvas.blit(self.ax.bbox)
        else:
            self.set_cross_hair_visible(True)
            # update the line positions
            x, y = event.xdata, event.ydata
            self.horizontal_line.set_ydata(y)
            self.vertical_line.set_xdata(x)
            self.text.set_text('x=%1.2f, y=%1.2f' % (x, y))

            self.ax.figure.canvas.restore_region(self.background)
            self.ax.draw_artist(self.horizontal_line)
            self.ax.draw_artist(self.vertical_line)
            self.ax.draw_artist(self.text)
            self.ax.figure.canvas.blit(self.ax.bbox)


x = np.arange(0, 1, 0.01)
y = np.sin(2 * 2 * np.pi * x)

fig, ax = plt.subplots()
ax.set_title('Blitted cursor')
ax.plot(x, y, 'o')
blitted_cursor = BlittedCursor(ax)
fig.canvas.mpl_connect('motion_notify_event', blitted_cursor.on_mouse_move)

12
データポイントへのスナップ#
次のカーソルは、その位置をオブジェクトのデータ ポイントにスナップしLine2D
ます。
不要な再描画を保存するために、最後に示されたデータ ポイントのインデックスが に保存されself._last_indexます。再描画は、別のデータ ポイントを選択する必要があるほどマウスが遠くまで移動した場合にのみトリガーされます。これにより、多くの再描画による遅延が減少します。もちろん、さらに高速化するためにブリッティングを追加することもできます。
class SnappingCursor:
    """
    A cross hair cursor that snaps to the data point of a line, which is
    closest to the *x* position of the cursor.

    For simplicity, this assumes that *x* values of the data are sorted.
    """
    def __init__(self, ax, line):
        self.ax = ax
        self.horizontal_line = ax.axhline(color='k', lw=0.8, ls='--')
        self.vertical_line = ax.axvline(color='k', lw=0.8, ls='--')
        self.x, self.y = line.get_data()
        self._last_index = None
        # text location in axes coords
        self.text = ax.text(0.72, 0.9, '', transform=ax.transAxes)

    def set_cross_hair_visible(self, visible):
        need_redraw = self.horizontal_line.get_visible() != visible
        self.horizontal_line.set_visible(visible)
        self.vertical_line.set_visible(visible)
        self.text.set_visible(visible)
        return need_redraw

    def on_mouse_move(self, event):
        if not event.inaxes:
            self._last_index = None
            need_redraw = self.set_cross_hair_visible(False)
            if need_redraw:
                self.ax.figure.canvas.draw()
        else:
            self.set_cross_hair_visible(True)
            x, y = event.xdata, event.ydata
            index = min(np.searchsorted(self.x, x), len(self.x) - 1)
            if index == self._last_index:
                return  # still on the same data point. Nothing to do.
            self._last_index = index
            x = self.x[index]
            y = self.y[index]
            # update the line positions
            self.horizontal_line.set_ydata(y)
            self.vertical_line.set_xdata(x)
            self.text.set_text('x=%1.2f, y=%1.2f' % (x, y))
            self.ax.figure.canvas.draw()


x = np.arange(0, 1, 0.01)
y = np.sin(2 * 2 * np.pi * x)

fig, ax = plt.subplots()
ax.set_title('Snapping cursor')
line, = ax.plot(x, y, 'o')
snap_cursor = SnappingCursor(ax, line)
fig.canvas.mpl_connect('motion_notify_event', snap_cursor.on_mouse_move)
plt.show()

スクリプトの合計実行時間: ( 0 分 1.133 秒)