ノート
完全なサンプルコードをダウンロードするには、ここをクリックしてください
axisartist を使用したカスタム スパイン#
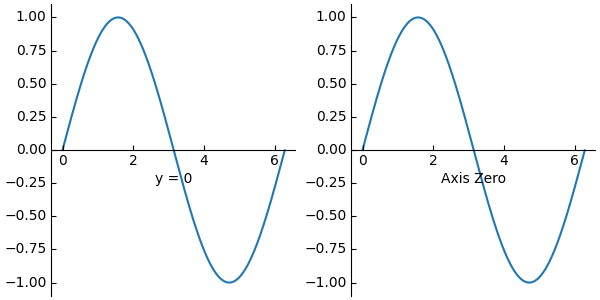
axisartistこの例では、 を使用してカスタム位置 (ここでは ) にスパインを描画する方法を紹介しています。y = 0
ただし、標準的な
Spine方法
を使用してこの効果を実現する方が簡単であることに注意してください。

import matplotlib.pyplot as plt
from mpl_toolkits import axisartist
import numpy as np


fig = plt.figure(figsize=(6, 3), constrained_layout=True)
# To construct axes of two different classes, we need to use gridspec (or
# MATLAB-style add_subplot calls).
gs = fig.add_gridspec(1, 2)


ax0 = fig.add_subplot(gs[0, 0], axes_class=axisartist.Axes)
# Make a new axis along the first (x) axis which passes through y=0.
ax0.axis["y=0"] = ax0.new_floating_axis(nth_coord=0, value=0,
                                        axis_direction="bottom")
ax0.axis["y=0"].toggle(all=True)
ax0.axis["y=0"].label.set_text("y = 0")
# Make other axis invisible.
ax0.axis["bottom", "top", "right"].set_visible(False)


# Alternatively, one can use AxesZero, which automatically sets up two
# additional axis, named "xzero" (the y=0 axis) and "yzero" (the x=0 axis).
ax1 = fig.add_subplot(gs[0, 1], axes_class=axisartist.axislines.AxesZero)
# "xzero" and "yzero" default to invisible; make xzero axis visible.
ax1.axis["xzero"].set_visible(True)
ax1.axis["xzero"].label.set_text("Axis Zero")
# Make other axis invisible.
ax1.axis["bottom", "top", "right"].set_visible(False)


# Draw some sample data.
x = np.arange(0, 2*np.pi, 0.01)
ax0.plot(x, np.sin(x))
ax1.plot(x, np.sin(x))

plt.show()